Keeping your home’s roof in great shape is crucial for ensuring it protects you from the elements. If you have an asphalt roof, you might wonder how to maintain it properly. That’s where this comprehensive guide comes in. We’ll walk you through everything you need to know about asphalt roof repair, including:
- The importance of asphalt roof maintenance
- Do’s and don’ts of asphalt roof repair
- 9 Steps to repair an asphalt roof
- How to decide when to call a professional
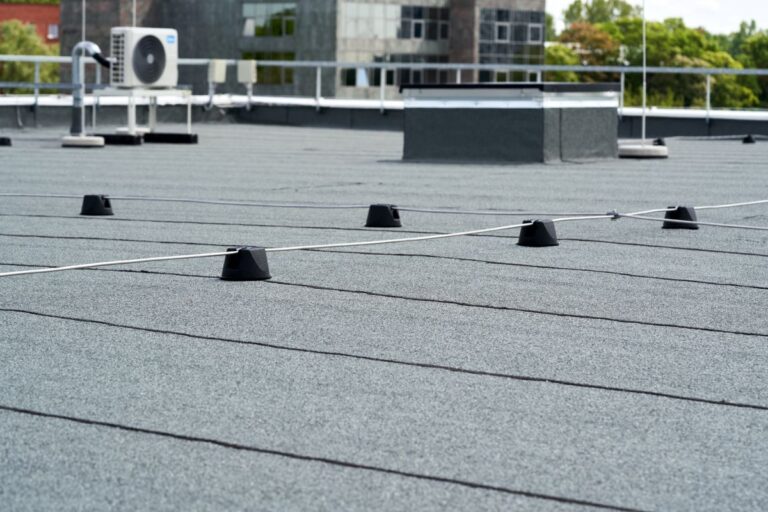
🏠 The Importance of Asphalt Roof Maintenance

Your asphalt roof is crucial for protecting your home, and regular maintenance can significantly extend its lifespan while preventing expensive repairs. Homeowners often opt for asphalt roofs due to their durability, lasting 20-30 years with proper care, and their cost-effectiveness compared to other roofing materials, making them a budget-friendly choice.
In addition to durability, asphalt roofs provide essential protection against harsh weather, shielding your home from rain, snow, and wind damage. Regular upkeep ensures that your roof remains in excellent condition, offering a reliable defense. Plus, a well-maintained asphalt roof can enhance your home’s curb appeal, making it more attractive to potential buyers if you ever choose to sell.
Common Issues with Asphalt Roofs
Before you begin any repairs, it’s essential to understand the common issues that can arise with asphalt roofs.
Shingle Damage
One of the most common problems is shingle damage, which can occur due to wind, rain, hail, or even the natural aging process of the materials. Damaged shingles often lead to leaks and can cause further structural damage if not addressed promptly. Regular inspections can help identify damaged shingles early, allowing for timely repairs and preventing more extensive issues down the line.
Granule Loss
Over time, you might notice granules from your shingles accumulating in your gutters. This is a sign of wear and tear, indicating that your shingles might need replacing soon. Granule loss can compromise the shingles’ ability to protect your roof from UV rays and weather elements, ultimately leading to more significant issues if left unchecked. Keeping an eye on granule loss can help you stay proactive about your roof’s health.
Roof Leaks
Leaks can occur due to various reasons, such as damaged flashing, missing shingles, or even poor installation. It’s crucial to address leaks immediately to prevent water damage to your home, which can lead to mold growth and costly repairs. Regular maintenance and inspections can help identify potential leak sources, allowing homeowners to take corrective action before they escalate into more severe problems.
❗️ Do’s and Don’ts of Asphalt Roof Repair
When it comes to repairing your asphalt roof, there are some critical do’s and don’ts to keep in mind.
Do Inspect Regularly: Regular inspections are vital for catching issues early. Look for damaged or missing shingles, granule loss, and signs of leaks. Address any problems you find promptly.
Don’t Ignore Small Issues: Small issues can quickly escalate into significant problems if ignored. A missing shingle today can lead to a leak tomorrow. Be proactive in addressing any repairs needed.
Do Use Quality Materials: When making repairs, always use high-quality materials. Cheap materials might save you money initially but can lead to more frequent repairs and costs in the long run.
🛠️ 9 Steps to Repair an Asphalt Roof
If you’re ready to tackle some minor repairs yourself, follow these steps to ensure a successful outcome. Not only will these repairs extend the life of your roof, but they can also save you money in the long run.
1. Gather Your Tools
Before you embark on your roofing project, it’s essential to gather all the necessary tools to make the process smooth and efficient. You will need:
- Hammer: For driving nails and securing shingles.
- Roofing Nails: These are specially designed to withstand the elements and hold your shingles in place.
- Pry Bar: A handy tool to carefully remove damaged shingles without causing further harm.
- Replacement Shingles: Ensure you have the correct type and color to match your existing roof.
- Roofing Cement: This will help create a watertight seal and is essential for securing shingles.
- Utility Knife: Useful for cutting shingles to size or trimming any excess material.
Having these tools on hand will make the repair process much more manageable.
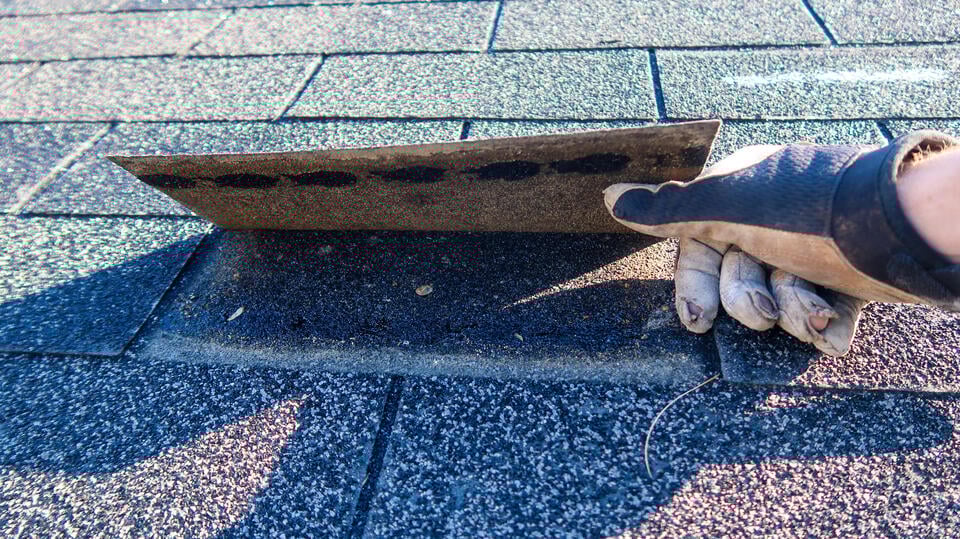
2. Remove Damaged Shingles
Carefully removing damaged shingles is crucial. Use a pry bar to lift the edges of the shingles gently. Start at the bottom and work your way up to avoid damaging the surrounding shingles. If the shingles are particularly stubborn, use your utility knife to cut through any roofing cement holding them in place. Take care during this process as you don’t want to create more damage that will require additional repairs.
3. Inspect the Underlayment
Once the damaged shingles are removed, it’s time to inspect the underlayment. This layer provides additional protection against moisture. Look for any tears, holes, or signs of water damage. If you find any damaged sections, carefully cut them out and replace them with new underlayment material. Ensuring a solid and intact underlayment is key to preventing leaks in the future.
4. Address Flashing Issues
Flashing is crucial in protecting vulnerable areas of your roof, such as around chimneys, vents, and skylights. Inspect the flashing for signs of rust, cracks, or missing pieces. If you notice any issues, repair them with roofing cement or replace the flashing entirely if it’s severely compromised. Properly sealed and intact flashing will help prevent water from seeping into your home.
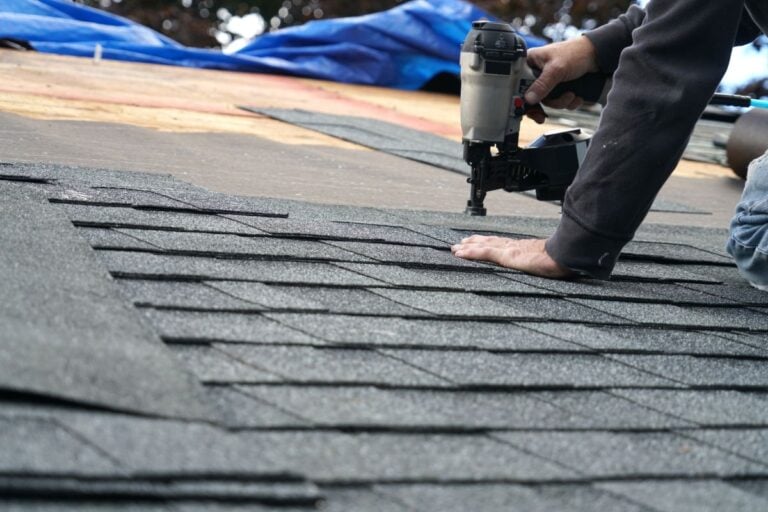
5. Install New Shingles
With the underlayment and flashing secured, it’s time to install the new shingles. Slide the replacement shingle into place, making sure it aligns with the existing shingles. Use roofing nails to secure it, placing the nails at the manufacturer’s recommended points. After nailing, apply roofing cement around the edges of the new shingle to create a watertight seal, which will protect against leaks.
6. Check Your Work
Once the new shingles are installed, inspect the repaired area carefully. Ensure that the shingles are secure and that there are no loose nails or gaps. Run your hand over the area to feel for any irregularities. A thorough inspection at this stage can save you from future problems, so take your time to ensure everything is in order.
7. Clean the Area
A clean work area is essential for effective repairs. Remove any debris, old shingles, or loose nails that may have accumulated during the repair process. Clearing the area will not only help with the application of new materials but also ensure that the repaired sections can properly adhere to the underlying layers without interference.
8. Apply a Protective Coating
After completing your repairs, consider applying a protective roofing sealant or coating. This step enhances the durability of the repair and provides additional weather resistance. Look for a sealant that is specifically designed for asphalt roofs to ensure compatibility. This coating can help prolong the life of your roof and deter potential damage from the elements.
9. Regular Maintenance
Regular maintenance is key to prolonging the life of your roof. Schedule inspections at least twice a year, particularly after severe weather events. During these inspections, look for loose shingles, damaged flashing, or any other signs of wear and tear. Addressing small issues promptly can prevent them from escalating into larger, more costly repairs down the line.
👨🔧 How to Decide When to Call a Professional

While DIY repairs can be suitable for minor issues, some situations require professional help.
Extensive Damage: If your roof has extensive damage, such as multiple missing shingles or a significant leak, it’s best to call in professionals like Palladium Roofing for assistance. Professionals can assess the full extent of the damage, ensure that repairs are done correctly, and prevent further complications that might arise from a hastily done DIY job.
Lack of Experience: If you’re not confident in your roofing skills, it’s safer to call a professional. Climbing on your roof can be dangerous, and improper repairs can lead to more significant issues. Professionals have the expertise and training to handle roofing repairs safely and effectively, minimizing the risk of injury or additional damage to your home.
Warranty Considerations: Check your roof’s warranty before making any repairs. Some warranties require professional maintenance to remain valid. Attempting DIY repairs could void your warranty, leaving you financially responsible for future repairs that would have otherwise been covered. It’s always best to verify warranty terms and consult with a professional if you’re unsure.
🙌 Protect Your Home with Expert Asphalt Roofing Services
Maintaining and repairing your asphalt roof is vital for preserving the integrity of your home and ensuring its longevity. While DIY repairs can handle minor issues, there are times when you need a professional touch. That’s where we come in. Our team at Palladium Roofing offers unparalleled expertise and a commitment to quality, making us the team you can trust with your roofing needs. We use only the best materials and techniques, ensuring your repairs are both effective and lasting. Don’t leave your roof to chance. Contact Palladium Roofing today for a free consultation and let us keep your home protected from the elements for years to come.
Related Articles