Chimney Leak Repair in 5 Steps for Homeowners
A leaking chimney is more than just a nuisance; it can lead to significant damage to your home, causing structural issues and expensive repairs if not addressed promptly. But don’t worry! Even if you’re not a roofing expert, there are simple and effective steps you can take to tackle this issue.
In this comprehensive guide, we’ll cover the following topics to help you fix your chimney leaks and understand how to prevent them in the future:
- Common causes of chimney leaks
- 5-step guide for chimney leak repair
- Preventing future chimney leaks
🤔 Why Is Your Chimney Leaking?
Before starting repairs, it’s important to understand why chimneys leak. Identifying the root cause ensures you can address the issue effectively and achieve a longer-lasting solution.
Common causes include cracked flashing, which may have gaps or cracks where the chimney meets the roof, and a damaged chimney cap that allows rain, snow, and debris to enter. Worn-out mortar joints can also cause leaks as eroded mortar lets water seep in. Additionally, roof issues near the chimney, such as damaged shingles, and waterproofing failure, which causes porous chimneys to absorb and trap water, are frequent culprits.
Signs You Have a Leaking Chimney
Not all leaks are obvious. Here are some telltale signs to watch out for in your chimney or home:
- Stains inside the fireplace: Yellow, brown, or wet spots near the firebox.
- Dripping sounds during rainstorms: Water entering the chimney can create audible drips.
- Musty smells: Moisture build-up can lead to unpleasant odors.
- Peeling paint or wallpaper: Walls near the chimney might show visible water damage.
- Ceiling leaks: Skylights or areas surrounding the chimney may develop water stains.
✅ 5 Steps to Repair a Leaking Chimney
Follow this step-by-step guide to address your chimney leak confidently. While DIY solutions can help, some cases may require professional intervention for safety and thoroughness.
1. Inspect the Area
Begin by thoroughly examining your chimney and the surrounding roof area. A careful inspection is critical to identifying potential issues that may lead to costly repairs down the line. Start with a visual inspection from the ground or use a sturdy ladder to get a closer look. Pay attention to visible problems such as cracks in the flashing, loose or crumbling bricks, missing mortar, or gaps around the chimney base. These issues can allow water to seep in, causing leaks or compromising the structural integrity of your chimney and roof.
To detect water leaks, use a garden hose to gently run water over different sections of the chimney and surrounding area. Have someone inside your home observe the ceiling or walls near the chimney to identify where water might enter. This targeted approach will help you pinpoint the exact problem areas, allowing you to address them effectively. Regular inspection should be part of your routine maintenance to catch small problems before they escalate.
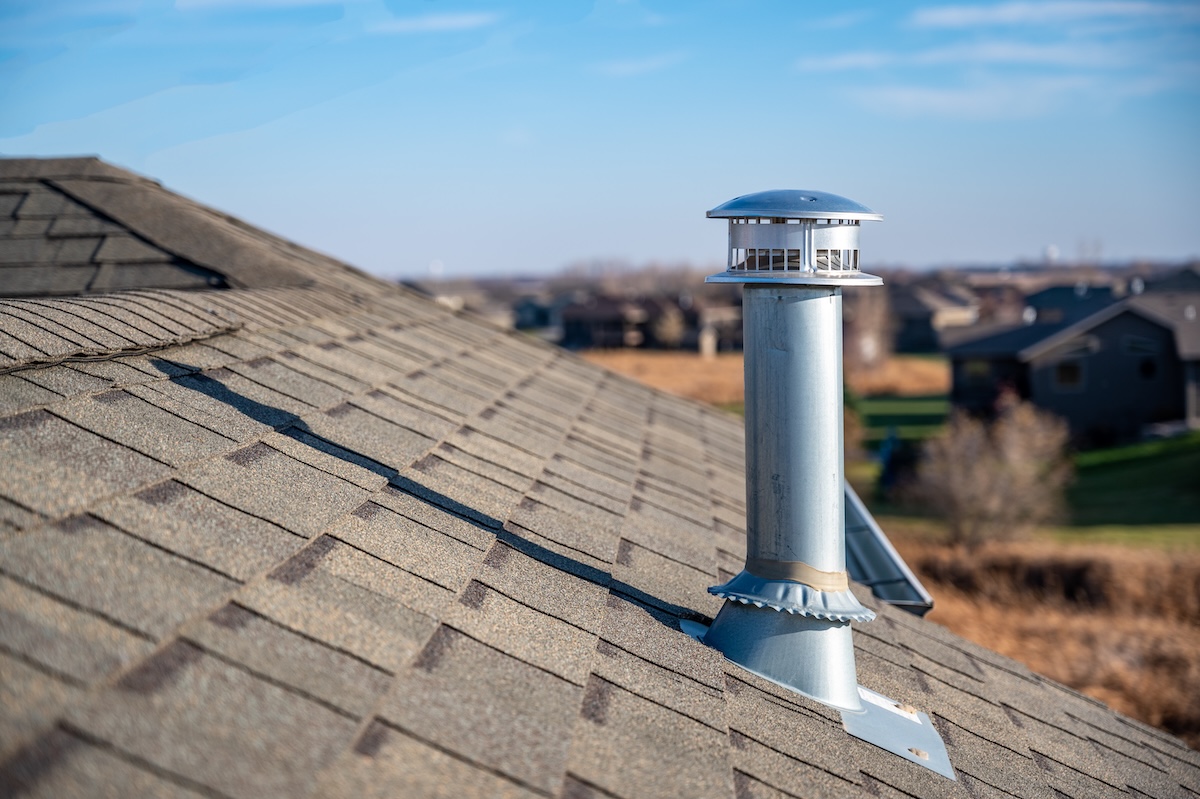
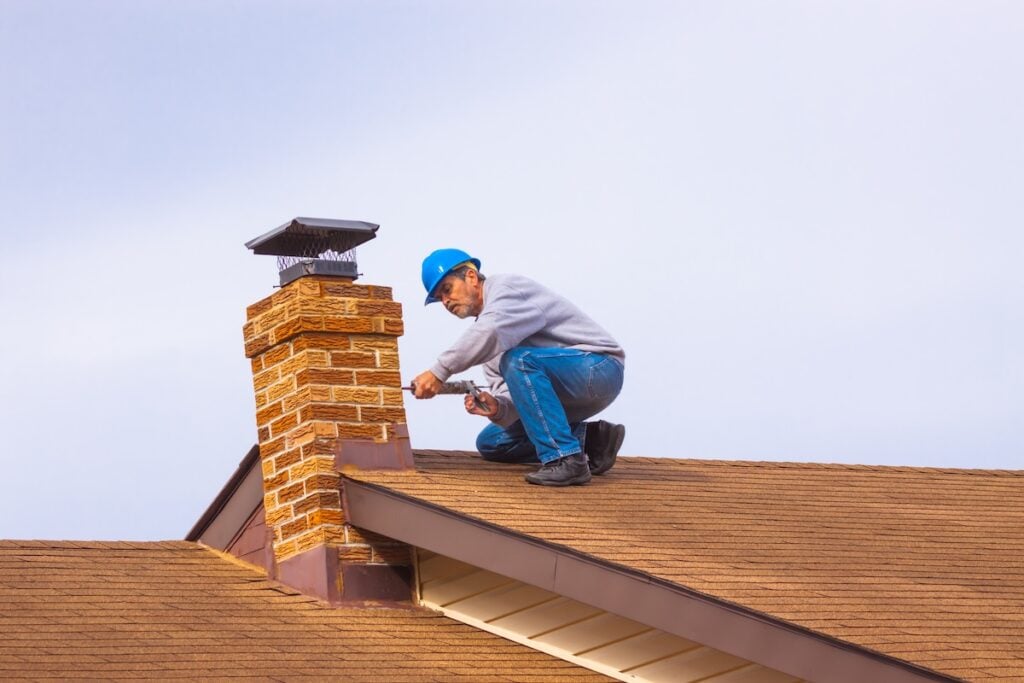
2. Check the Chimney Cap
A damaged or missing chimney cap is one of the most common chimney issues, but it’s also one of the easiest to fix. The chimney cap plays a crucial role in protecting your chimney from rain, snow, and debris while preventing birds, squirrels, or other animals from entering the flue. Without a functioning chimney cap, your chimney becomes vulnerable to moisture damage, debris buildup, and unwanted critters that can cause blockages or other problems.
If your chimney cap is missing, broken, or showing signs of wear, it’s essential to replace it promptly. Visit a hardware or home improvement store to find a durable stainless-steel cap, as these are resistant to rust and provide long-lasting protection. Be sure to measure your chimney flue properly to ensure a snug fit. Follow the manufacturer’s instructions to securely attach the cap to your chimney, using screws or clamps as needed. This simple addition can save you from costly structural or moisture-related repairs in the future. Regularly check the condition of your chimney cap during seasonal maintenance to ensure it remains intact and functional.
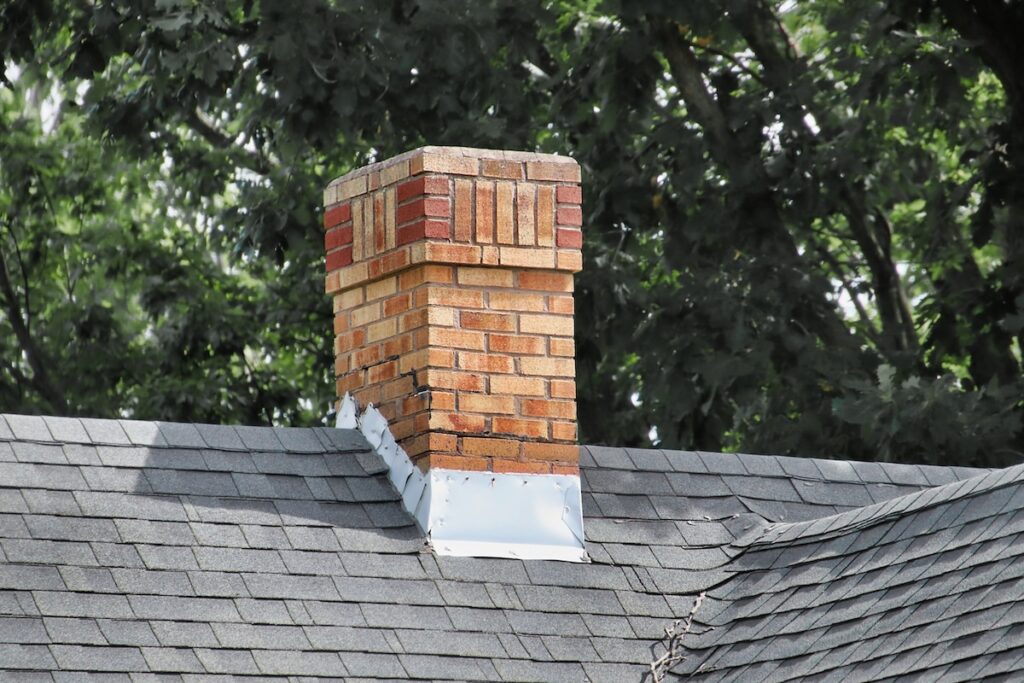
3. Reseal the Flashing
Flashing is the metal material that seals the joints between your chimney and the roof, creating a watertight barrier to prevent leaks. Over time, flashing can develop cracks, corrode, or loosen due to weather exposure, leading to water infiltration. If you notice signs of damage, such as rust, gaps, or peeling sealant, it’s important to act quickly to avoid further problems.
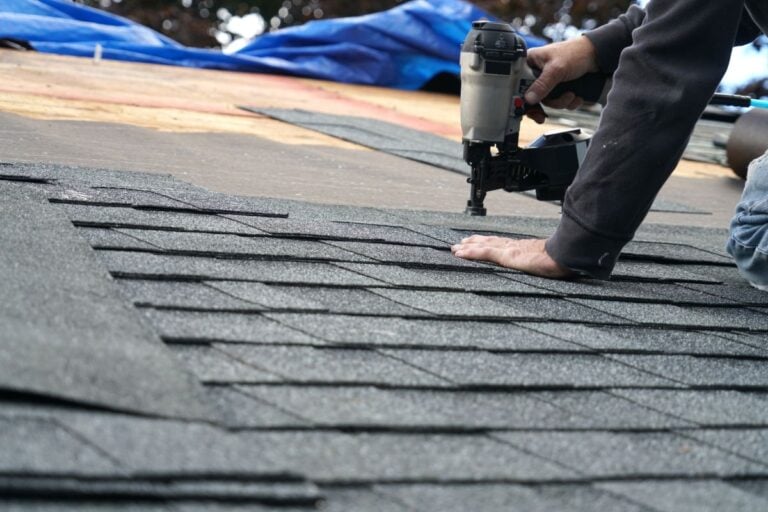
Begin by cleaning the area where the flashing meets the roof and chimney. Remove any debris, dirt, or old sealant to ensure a clean surface for the new application. Use a high-quality roofing sealant or silicone caulk to fill in cracks, gaps, or loose edges. Apply the sealant evenly, making sure to cover all vulnerable areas, and smooth it out with a putty knife for a neat finish. Allow the sealant to dry completely before exposing it to water or heavy use. If the flashing is severely damaged or corroded, it may need to be replaced entirely, which may require professional assistance. Resealing or replacing the flashing is a crucial step in maintaining your chimney’s waterproofing and protecting your home from water damage.
4. Waterproof the Chimney
Moisture is one of the most significant threats to your chimney’s structural integrity, as it can weaken the bricks and mortar over time. Waterproofing your chimney is an essential step to protect it from rain, snow, and other environmental elements. A good waterproofing solution creates a breathable barrier, allowing moisture already trapped inside the chimney to escape while preventing new water from entering.
Start by cleaning the chimney’s exterior thoroughly to remove dirt, mildew, or debris. This ensures the waterproofing solution adheres properly to the surface. Use a brush, roller, or sprayer to evenly apply the waterproofing solution to the entire chimney surface, paying extra attention to mortar joints and areas prone to water damage. Be sure to follow the manufacturer’s recommendations for the number of coats needed and drying time. Avoid using products that create a non-breathable seal, as these can trap moisture inside and cause further damage.
For the most effective protection, reapply the waterproofing solution every few years, as recommended. This proactive step will help extend the lifespan of your chimney and reduce the risk of costly water-related repairs.
5. Patch Mortar Joints or Contact Experts
The mortar joints between the bricks of your chimney play a vital role in its overall stability. Over time, exposure to weather conditions can cause mortar to crack or deteriorate, weakening the structure and making it more susceptible to damage. Addressing these issues promptly can prevent further problems and ensure your chimney remains safe and functional.
For minor cracks, use a mortar repair caulking gun to apply fresh mortar directly into the gaps. Smooth the repairs with a trowel to create a clean, even finish. Be sure to match the color and composition of the new mortar to the existing one for a seamless repair. Allow the mortar to cure fully before exposing it to water or heavy use.
If the damage to the mortar is extensive or if you notice significant wear and tear on the chimney, it’s best to call in professional chimney repair specialists. Experts can perform tuckpointing, a process that involves removing damaged mortar and replacing it with fresh material. They can also address more advanced repairs, such as structural reinforcement or brick replacement, to restore your chimney’s integrity. Investing in professional repairs when necessary will help ensure your chimney remains safe, functional, and able to withstand the elements for years to come.
🛠️ Preventing Future Chimney Leaks
Once your chimney is repaired, a few proactive steps can help you avoid future issues:
Regular Inspections
Schedule annual inspections for your roof and chimney to ensure they stay in optimal condition. Over time, wear and tear from weather exposure can lead to a range of issues, such as cracks in the mortar, loose flashing, leaks, or even structural weakening. A professional checkup conducted by a certified inspector can help identify these potential problems early, giving you the chance to address them before they turn into costly repairs or safety hazards. Inspections are especially crucial after harsh winters or severe storms, as these events can cause hidden damage. By committing to regular maintenance, you can extend the life of your roof and chimney, save money on major repairs, and maintain the safety and efficiency of your home.
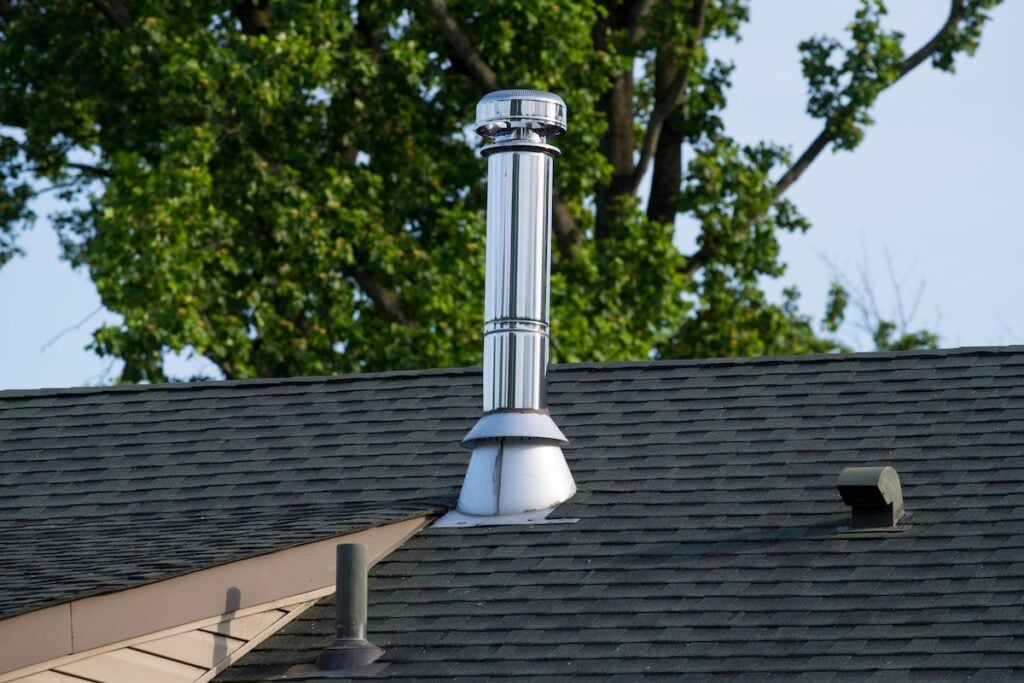
Install a High-Quality Chimney Cap
A high-quality chimney cap is a small but significant investment in protecting your chimney from external elements. This simple addition acts as a barrier against rain, snow, debris, and even small animals like birds or squirrels that might attempt to nest inside your chimney. Without a chimney cap, water can seep inside, leading to moisture buildup, rust, and deterioration of internal components. Debris, such as leaves or branches, can also create blockages that prevent proper ventilation, which could result in smoke and harmful gases entering your home. A durable chimney cap not only keeps your chimney clear and functional but also prevents the need for costly cleaning or repairs down the road. Additionally, it helps improve energy efficiency by reducing drafts and keeping out cold air during the winter. This small upgrade offers long-term protection and peace of mind for your chimney system.
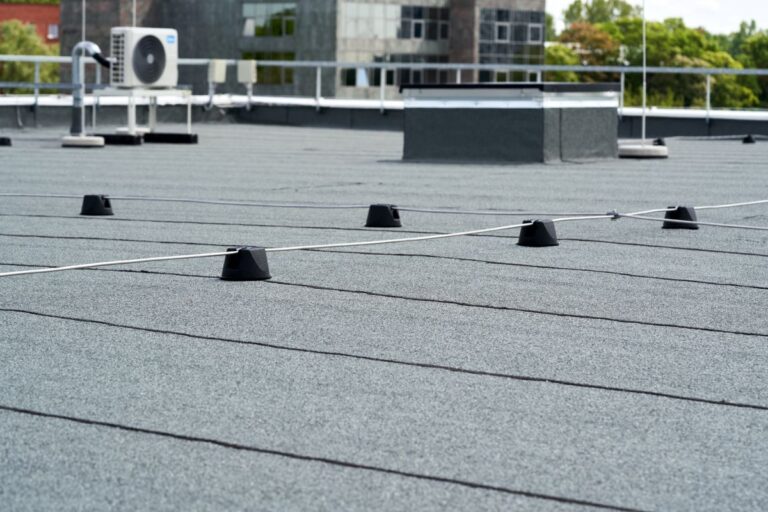
Maintain the Roof
Your roof plays a vital role in protecting your home, and maintaining it around the chimney is essential to avoid serious issues. Start by routinely inspecting the shingles, especially those located near the chimney, as they are more prone to damage due to water runoff and flashing vulnerabilities. Damaged or missing shingles should be replaced immediately to prevent water from seeping into your home and causing leaks or interior damage. Additionally, be proactive about cleaning your gutters and downspouts. Clogged gutters can lead to water pooling around the base of the chimney, which can erode masonry, weaken the foundation, and create long-term structural problems. Consider adding flashing sealant around the chimney to ensure a tight, water-resistant seal and prevent leaks. Regular roof care not only protects your chimney but also enhances the safety and longevity of your entire home, saving you money and headaches in the future.
🏠 Chimney Leak Repair
At Palladium Roofing, we understand how important it is to address chimney leaks quickly and effectively. With years of experience, high-quality materials, and a commitment to putting our customers first, we’re the team you can trust to protect your home and restore your peace of mind.
Don’t let a small leak turn into a costly problem—reach out to Palladium Roofing today for a no-obligation consultation and a free roof inspection. Let us help you safeguard your home with reliable, expert service!
Related Articles