What To Do When New Roof Shingles Are Not Laying Flat

New shingles should lie seamlessly on your roof, forming a smooth and uniform surface. But what happens if they don’t? If your new roof shingles are not laying flat, you may notice uneven areas or raised edges that don’t sit quite right. While this can be frustrating, it’s not entirely uncommon, and in many cases, it’s fixable.
In this guide, we’ll walk you through why this happens and what you can do to address the issue:
- Why your new roof shingles might not be laying flat
- 5 steps for fixing new roof shingles that are not laying flat
- When to call a professional for help
🤔 Why Your New Roof Shingles Might Not Be Laying Flat

Noticing uneven shingles on your new roof can be concerning, but it’s not always a sign of major issues. There are several factors that can affect how shingles lay after installation. Understanding these causes can help you identify whether the issue is temporary or something that requires professional attention. Here are the most common reasons why your new roof shingles might not be laying flat:
- Weather Conditions During Installation: Extreme heat or cold can cause shingles to warp or not adhere properly. Cold weather makes shingles brittle and harder to align, while excessive heat can leave them too flexible and prone to misalignment.
- Improper Installation: Mistakes like incorrect nailing, improper spacing, or failing to use a straight guideline can lead to uneven sections and compromise your roof’s integrity.
- Substrate Problems: The substrate, typically plywood or roof decking under the shingles, can cause unevenness if it’s damaged, uneven, or deteriorated.
- Natural Settling Period: New shingles may appear uneven at first but often settle into place after exposure to sunlight, which softens them and helps them lay flat.
✅ 5 Steps to Fix New Roof Shingles Not Laying Flat

If your shingles still won’t lie properly after they’ve had time to settle, here are five steps you can take to fix the issue:
1. Inspect Your Roof
Start by conducting a thorough inspection of your roof to identify any potential issues. This step is crucial as it allows you to catch problems early before they escalate into more significant damage. Begin by walking the perimeter of your home and scanning the roof from a distance to spot any noticeable irregularities. Use binoculars if necessary to get a closer look at hard-to-reach areas.
Next, climb onto the roof safely using a sturdy ladder and inspect it up close. Pay attention to signs of wear and tear, such as lifted edges, buckling, raised seams, or overlapping shingles. These are indicators that the shingles may be compromised or improperly installed.
As you inspect each section of the roof, take detailed notes of all problematic spots, including their exact locations, so you can address each issue systematically. Taking photos of the problem areas is also a good idea for reference later. Remember to prioritize safety during your inspection—wear slip-resistant shoes and avoid walking on steep or unstable surfaces.
2. Check for Substrate Issues
After inspecting the shingles, shift your focus to the roof deck or substrate beneath them. The substrate serves as the foundation for your shingles, so any problems here can affect the entire roof’s durability and performance. Look for signs of unevenness, sagging, or damage to the roof deck.
Common issues include warped wood, rotten sections, or areas weakened by moisture intrusion. These can compromise the structural integrity of your roof and make it more susceptible to leaks and further damage. If you notice any warped or rotten areas, it’s essential to repair or replace them before addressing shingle issues. Neglecting substrate problems can lead to uneven shingle placement or cause new asphalt shingles to fail prematurely.
Use a level to check for evenness across the roof deck and ensure the surface is ready to support a fresh layer of shingles. If the substrate appears to be in poor condition, it’s best to consult a professional roofer to assess the extent of the damage and carry out the necessary repairs.
3. Apply Heat to the Shingles
If the weather has been cold or your roof is shaded for long periods, your shingles may become stiff, brittle, and challenging to work with. Shingles need to be pliable to conform to the roof’s surface properly, and applying gentle heat can help with this. Use a heat gun or a hair dryer to carefully warm the affected shingles.
Hold the heat source a few inches away from the shingle and move it back and forth to ensure even heating. Do not concentrate heat on one spot for too long, as this could damage the shingle’s protective coating or cause it to warp.
As the shingles soften, you’ll notice they become more flexible and easier to manipulate. This step is especially important when trying to reattach curled or lifted shingles, as it helps restore their shape and ensures they lie flat against the roof. However, exercise caution when using heat tools, and avoid overheating, as this could reduce the shingles’ durability and effectiveness over time.
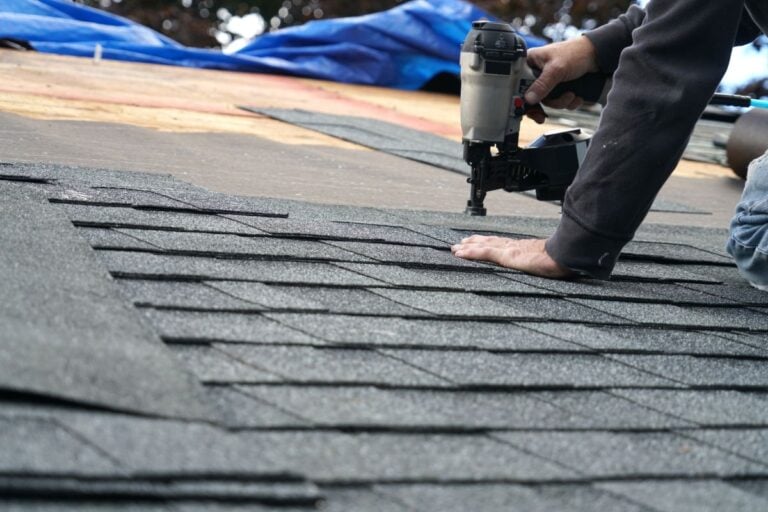
4. Re-adhere the Shingles
Once the shingles are pliable, you can begin re-adhering any that have lifted, curled, or come loose. Start by gently lifting the affected shingle to access the underside. Clean the area beneath the shingle to remove any dirt, debris, or old adhesive that may prevent a strong bond. Apply a generous but controlled amount of roofing adhesive to the underside of the shingle.
Roofing adhesive is specifically designed to withstand outdoor conditions and provide a long-lasting hold. Once the adhesive is in place, press the shingle down firmly to ensure it bonds securely with the roof surface. Hold it in place for a few seconds to allow the adhesive to set. In some cases, you may need to use roofing nails to provide additional security, particularly in areas prone to high winds.
If you use nails, position them strategically to avoid puncturing the shingle unnecessarily. After securing the shingle, wipe away any excess adhesive, as it can harden and create an unsightly mess if left unattended.
5. Replace Any Damaged Shingles
If you encounter shingles that are cracked, broken, or so severely curled that they cannot be salvaged, replacement is the best option. Begin by carefully removing the damaged shingles. Use a pry bar or roofing tool to lift the edges of the shingles surrounding the damaged one, then gently loosen and remove the nails securing it in place. Take care not to disturb or damage adjacent shingles during this process.
Once the damaged shingle is removed, prepare the area by cleaning the surface and ensuring it is free of debris. Align the new shingle with the surrounding ones to maintain a uniform appearance and proper spacing. Secure the replacement shingle by nailing it into place, using roofing nails designed for outdoor durability.
To finish, apply a small amount of roofing adhesive along the edges of the new shingle to seal it against the roof and prevent water penetration. This step ensures the replacement integrates seamlessly with the rest of the roof, preserving its overall functionality and appearance. Regularly replacing damaged shingles will help extend the life of your roof and protect your home from leaks and other weather-related issues.
👉 Why Palladium Roofing Is the Team You Can Count On

At Palladium Roofing, we understand the frustration of discovering your new roof shingles are not laying flat. That’s why we’re here to help, offering thorough inspections, expert recommendations, and high-quality solutions.
When you work with us, you’ll benefit from:
Expertise You Can Trust
With years of hands-on experience, our team has tackled every roofing challenge you can imagine. From minor shingle repairs to full roof replacements, we’ve done it all. You can count on us to bring knowledge, skill, and precision to every project, ensuring your roof is in the best hands possible.
Top-Tier Materials
We believe that quality materials are the foundation of a durable roof. That’s why we only use the best roofing products on the market. Our offerings include premium options with extended Malarkey Emerald Premium Warranties, providing you with peace of mind and long-lasting results. Your roof deserves nothing but the best.
Transparent Communication
We prioritize clear and honest communication throughout the entire process. From the initial inspection to the final touches, we’ll keep you informed every step of the way. No hidden fees, no surprises—just straightforward updates and a commitment to delivering exactly what you need.
Complimentary Inspections
Not sure what’s wrong with your roof? We’ve got you covered. We offer free, no-obligation roof inspections to help identify any issues and determine the best course of action. Whether it’s a small repair or a complete replacement, we’ll provide expert advice to guide your decision.
🏠 Your New Shingles Are Not Laying Flat
At Palladium Roofing, we understand how important it is to have a roof that not only looks great but also provides the durability and protection your home needs. With years of experience and a commitment to quality craftsmanship, our team is here to help identify and fix any issues with your shingles, ensuring your roof performs its best for years to come.
Don’t let uneven shingles turn into bigger problems—trust the experts at Palladium Roofing to get the job done right.
Contact us today for a free inspection and personalized advice.
Related Articles